
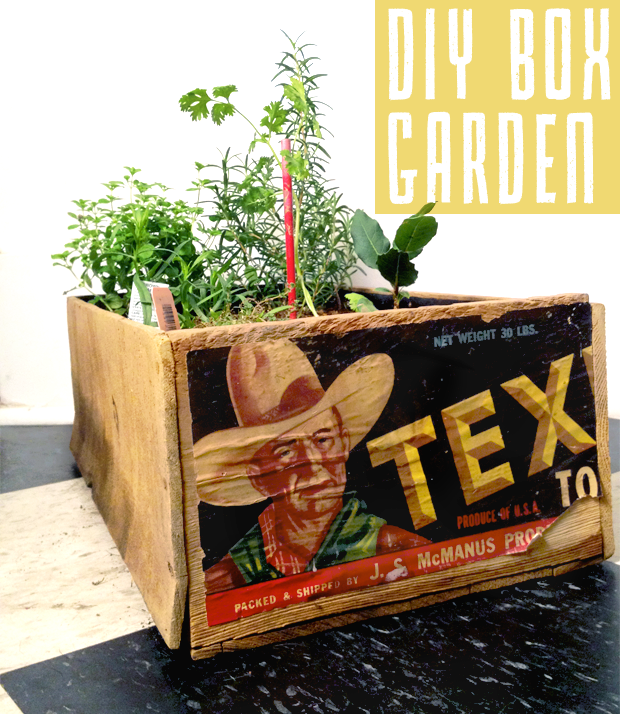
Hi! Do you remember our trip to the Belleville flea market last month? We bought this awesome old box and the plan was to make a cactus garden with it. But we noticed that our collection of herbs on the windowsill was growing exponentially and could use some real outdoor sunshine before the chill of the fall season. We decided it was time to give our little green friends a new home.
Here's the easy steps to make your own box garden!
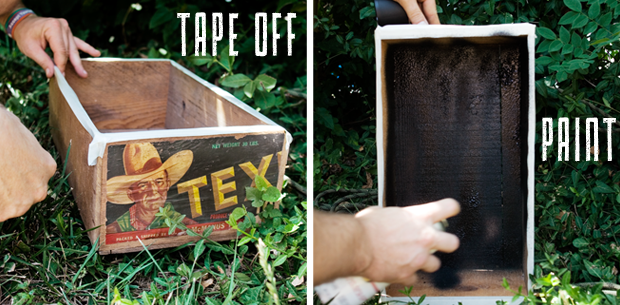
We bought some Rust-Oleum Leak Seal Flexible Rubber Coating and, after taping off the edges with masking tape, Judd gave it an even spray. We let it sit for a day to dry.
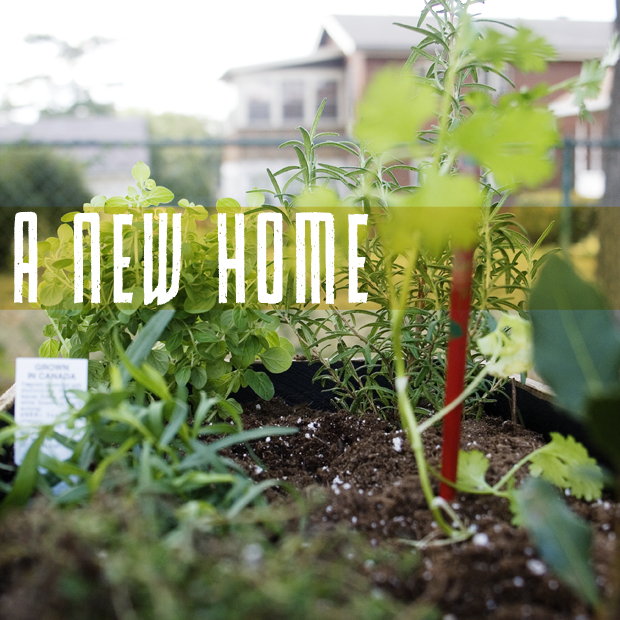
The next day, we did a quick mapping out of where to place our herbs. Then Judd filled the box about 2/3 full with dirt, and started planting! A good tip for new gardeners- if you've purchased a plant in a flexible plastic starter pot, give it some good squeezes to break up the soil, then tip the plant gently and shake it out of the pot. Judd showed me this trick and I'm sure its saved a lot of plants from the discomfort of me digging them out with my fingers!! When you're done planting, give them a nice drink of water and set them out to soak up the rest of that summer sun!
Have fun gardening!!
xo
P+E
Lovely :)
ReplyThank you for the idea! <3
Good thinkin'! I think we have just about everything we need to try this ourselves, but is the paint necessary?
Replyxx.
Hey Julia! Either use the paint or line it with a trash bag, otherwise the wood will rot! If you make one, send us a picture, we would love to see it! xox
This is adorable! What a great way to upcycle a vintage box!
Reply-Jamie
http://chatterblossom.blogspot.com/
Thank you!! xo
Just make sure that, if you're planting mint, you have it well separated (a pot inside the dirt might do it!) from everything else... otherwise, it will run wild and suffocate everything else!
ReplyI can't imagine planting a box without some kind of drainage!
Reply